
Explaining the Loop
A threader's weapon of choice against bad brows and unwanted hairs! But, how do we get from a spool of thread to a loop ready for hair removal. First we start with a nice long piece of thread, I like to measure to my elbow. However everyone’s hand and arm sizes differ so I encourage you to try what works best for you. (Meaning- try as many sizes as you can to find your “Goldie locks” size)
Once you have your piece ready, match up both ends and double knot it. Now you’re ready to thread, just make your twist in the center. (Better explained in the video on your portal, see Threading 101)
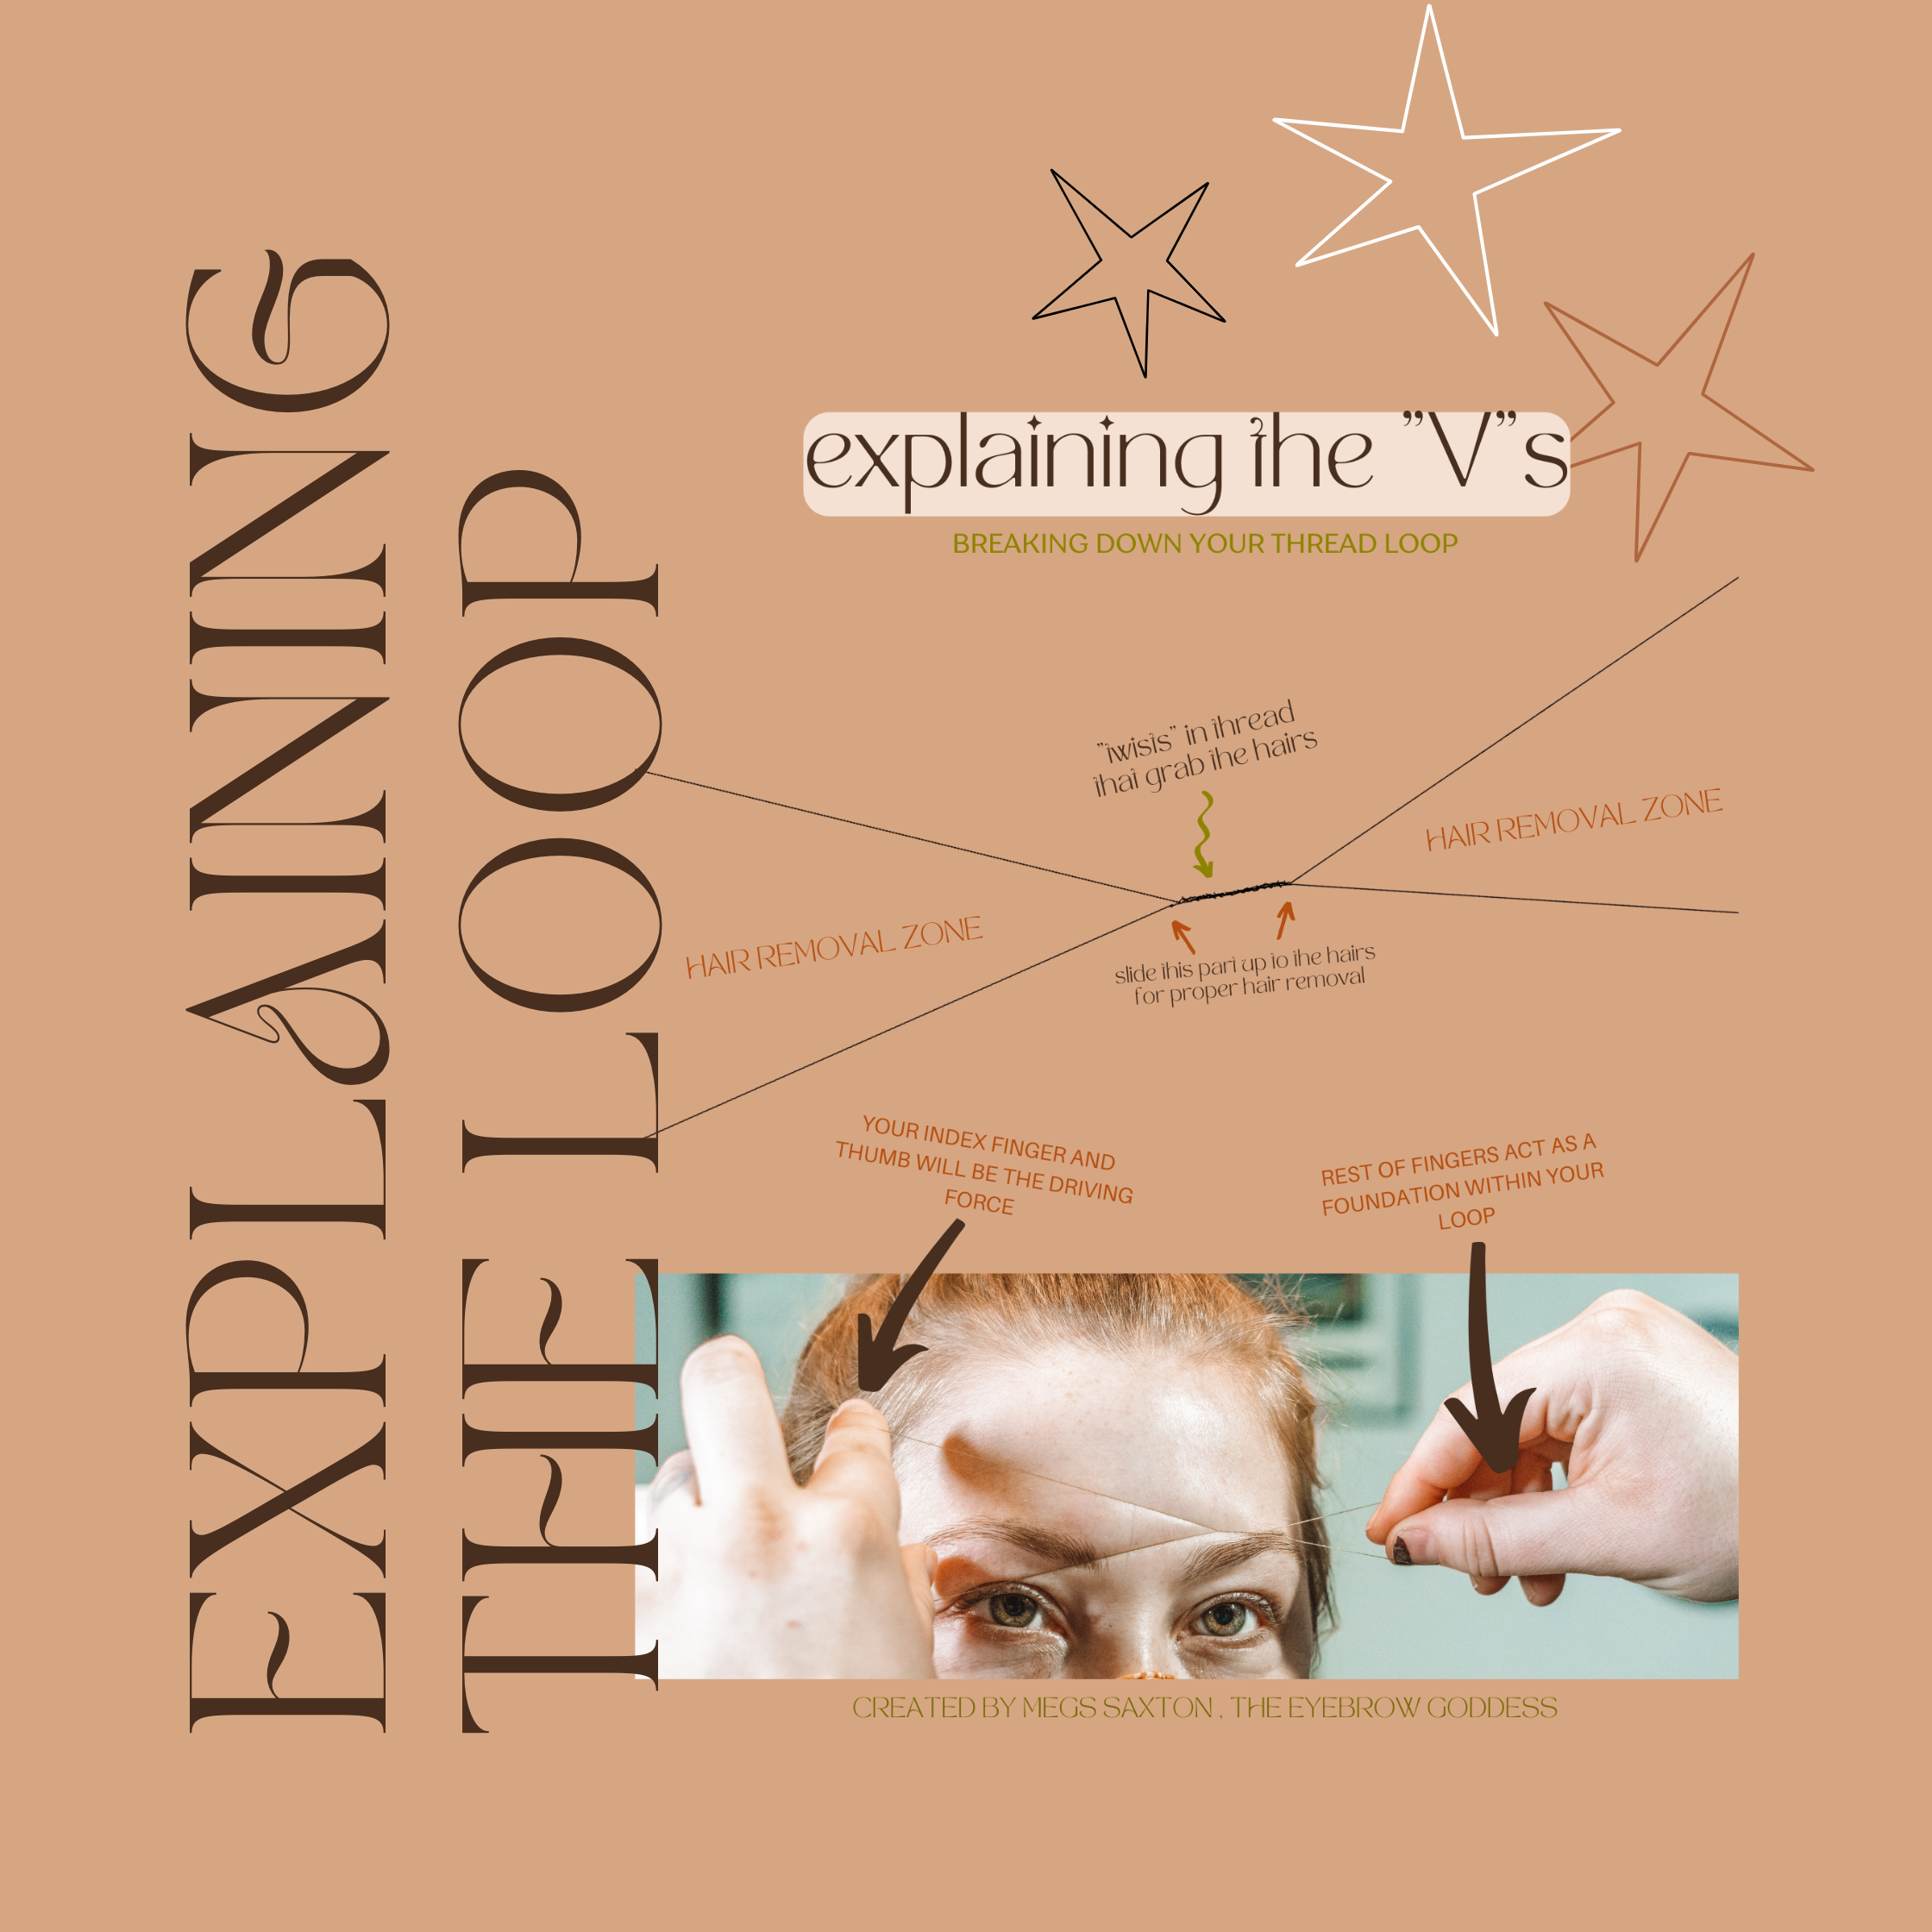
Once you’ve watched the video and have a better idea of what your thread loop should look like. Let’s talk about the “V”s, shown in the illustration below.
These “v”s are what removes the hairs, and if used properly, are the most effective form of hair removal. I think that's the secret sauce that’s kept it alive all these years. Thread wraps tightly around the hairs for a perfectly even pull.
If you ensure you’re using proper pressure, the thread “v” should line up right at the base of the hair shaft parallel to the skin. No damage to the skin, less damage to follicle, and clean removal of hair.
When you’re practicing make sure to watch both of your thread loop’s “v”s. As we know, when you rock back and forth you can remove hair from any direction. Great for when you’re threading larger areas. However not as great when working on tedious areas like the brows.
If you have any questions, drop a comment below!